
Here’s the equipment I used, this should work similarly on other software versions:
- Synology NAS Running DSM 7.0
- Raspberry Pi running Raspbian 10 (Buster)
This tutorial is based on these instructions from Synology, with modifications because they didn’t work exactly as listed: https://kb.synology.com/en-uk/DSM/tutorial/How_to_access_files_on_Synology_NAS_within_the_local_network_NFS
Enable NFS on the Synology NAS:
- From the Synology web interface, Go to Control Panel > File Services > NFS
- Check Enable NFS Service. Set Maximum NFS Protocol to NFSv4.1 and click Apply.
Create NFS Permissions:
-
Still in the Synology web interface, go to Control Panel > Shared Folder
-
Select the folder you want to share and click Edit
-
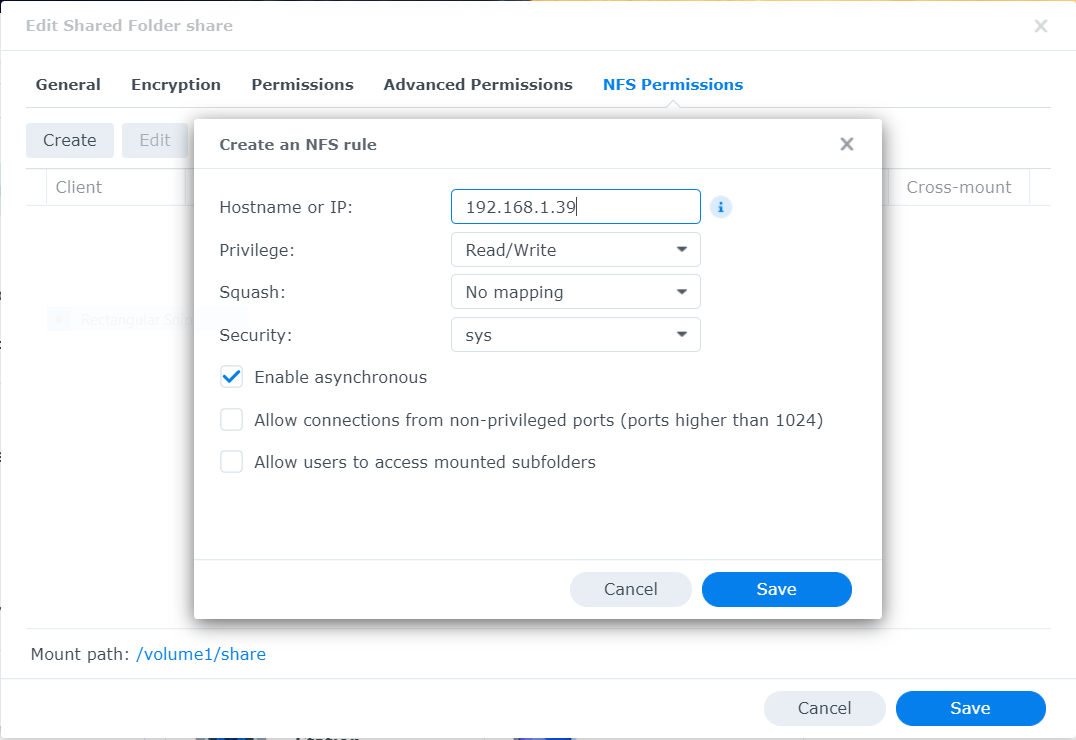
Click NFS Permissions > Create
Enter a hostname or IP for the Raspberry Pi that will be accessing the folder.
-
Leave Privilege on Read / Write and leave other settings at default, and click Save.
Note the Mount path at the bottom of the folder edit page, then click Save again to save the folder settings.
Mount share on the Raspberry Pi:
- From the terminal - install nfs if not already installed:
sudo apt updatesudo apt install nfs-common- Create the mount directory - change the path as appropriate:
sudo mkdir /mnt/share-
Here’s where Synology instructions didn’t work. I kept getting a timeout error when trying to mount the share. This answer helped me get on the right track.
-
To do a one time mount to ensure everything is working - replace IP address/hostname and paths as appropriate:
sudo mount -t nfs4 -o proto=tcp,port=2049 192.168.XX.XX:/volume1/share /mnt/share-
To mount so it persists after a reboot (thanks to this article):
-
Run
sudo nano /etc/fstab. -
Add this line to the bottom, again replacing IP addresses/hostname and file paths as needed:
192.168.XX.XX:/volume1/share /mnt/share nfs defaults 0 0- Exit, save the file, and reboot the Pi with
sudo reboot now. - Once the Pi is back up, ensure the mount worked with
ls /mnt/share.